12.07.2012

Playing doctor


Last week I played doctor with a turkey. It was, by far, one of the best cooking experiences ever. I took away the insides, injected the turkey, sewed it's skin, stuffed it... I felt like McDreamy.

But let me start from the beginning, because there is a beginning. Last week was the week after thanksgiving, and on Monday, Scott and I went to the store. They were out of almost everything, because like us, so many people were just back from the Holiday and needed to stock up with food. However, they still had a lot of turkeys, and because Thanksgiving was over, they were on sale. It was not my idea to buy a turkey (we had just had lots of turkey the week before), but I (almost) never say no to my fiance. You know, one time I said yes and he gave me a diamond ring, so now I try to always say yes, just in case. 

For 3 days the turkey was thawing in the refrigerator and I was looking for the best way to cook it. Then I thought that the best turkey I have ever had is the turkey that is roasted at my grandparents' house every Christmas. Besides, as I am not going to be home to eat that delicious turkey this Christmas for the first time in my whole life, so I had to make it myself.

My great aunt, la Tia Carmen, used to be the one in charge of making the turkey every year. After she passed away, my grandma and my aunt Isabel took over. Now it's mostly Isabel who makes it, but my grandma supervises her very closely to make sure that everything is perfect. 

Isabel gave me the recipe. She sent me a voice note through Whatsapp while she was at the grocery store. Gotta love technology! And aunts! ( Thanks Isa!)


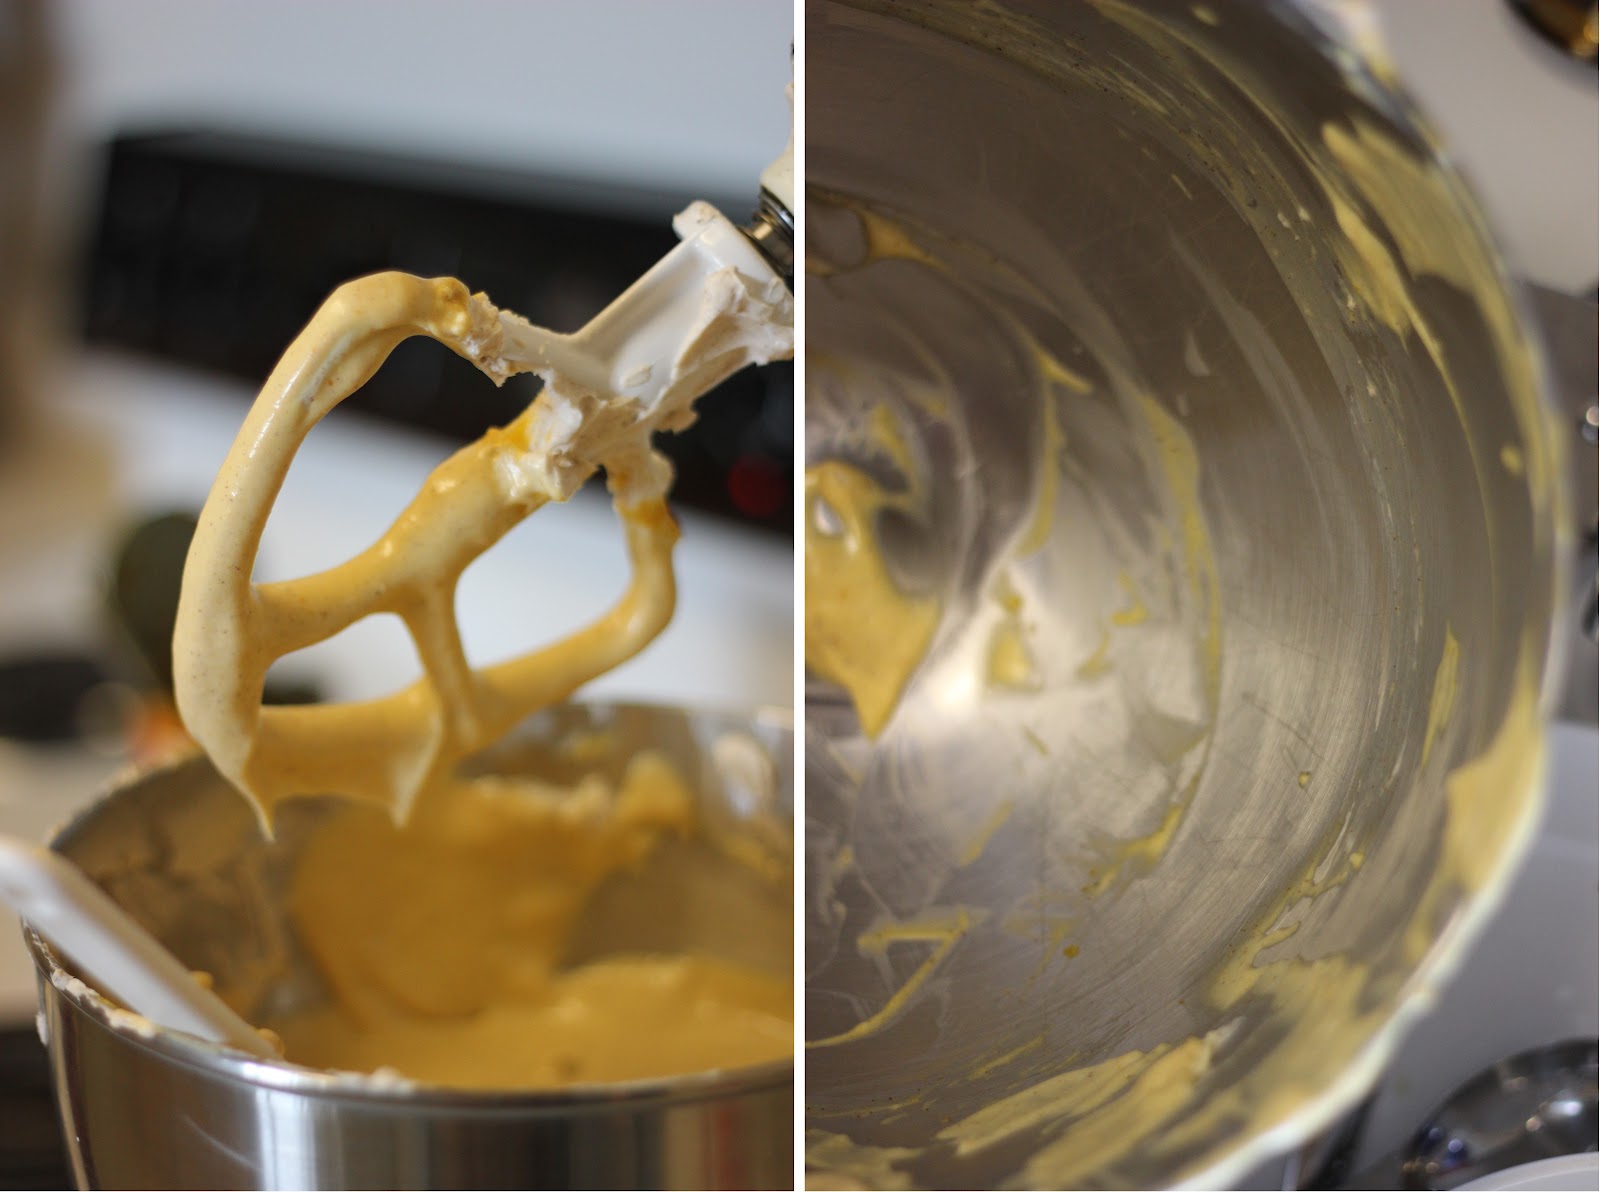
I started by taking the giblets from inside the turkey. Then I injected it all with brandy. This was so cool, it really felt like being a surgeon in the OR. Once injected, I made the stuffing, which is a cooked mix of ground meats, bacon, sausage, apple, and dried fruits. I added some brandy to it too.


I stuffed the turkey with the stuffing, which was a lot harder than it seemed. Then, I was told that I had to sew the skin to close the cavity in both the head and tail sides. Here came the CRISIS! I didn't have a needle that was thick enough for kitchen twine (to be honest, I did not have ANY kind of needle). I asked my aunt if I could just not close the bird -what a terrible surgeon I am- but she said no because then the stuffing would come out (kind of like what would happen with real patients if you don't close them up) and would not finish cooking . More CRISIS. She suggested to staple it. I don't even have a stapler!

However, I had come this far and I was not going to give up on my Christmas turkey now, plus sewing it would mean more surgeon playing. I used my engineering skills and I came up with a solution. I tied the twine to a toothpick and attached both with tape. I am not kidding.


It was a hard task, but the coolest of them all. I must have used at least 10 different toothpicks,  as they kept coming out of the thread, or braking. But I did it! I sewed the cavity and it looked good! After that, the hard work as over. I just rubbed the turkey with salt and olive oil and roasted it for what it seemed eternity.


 It was perfectly cooked, the stuffing was good, the turkey was very tasty and moist. We made cranberry sauce and Brussels's sprouts too. And the turkey the tasted just like the one at my grandma's! Something to really take pride on.


My family's Christmas Turkey

For the stuffing
1/2 lb (250 g) bacon, chopped
1 pack dried shitakee mushrooms, rehidrated, OR 1 tbsp grated truffle
1/2 lb (250 g) white sausage
1/2 lb (250 g) ground veal
1/2 lb (250 g) ground pork
1/2 cup (120 ml) cognac or sweet wine
9 oz (250 g) prunes
1 apple, cored and cut in 1/2 inch cubes

For the turkey
1 fresh or thawed turkey, clean, insides discarded
1 cup (230 ml) of brandy
Olive oil or lard
3 cups (700 ml) turkey or chicken stock

Make the stuffing
Put the bacon and mushrooms in a big heavy skillet over medium heat. When a lot of fat is released add the sausage and cook for 2 minutes. Add the ground meats and season with salt and pepper. Add the wine or cognac. When it is partially cooked (about 10 minutes), remove from heat and mix in the prunes and the apple. Let it cool.


Make the turkey
Rinse well the turkey in and out and pat it dry. Add salt and oil inside the cavity, distributing it well.

Use an injector to inject the brandy in the turkey's meat, distributing well between the breast and the legs.

Stuff the cavity with the stuffing, packing it well inside. You might not be able to fit all of it, depending on the size of the turkey.

Using kitchen twine and a thick needle, sew the skin to close both entrances to the cavity.

Truss the turkey so that the legs ad wings are tight for an even roasting. Spread salt and lard (or oil) all over the turkey. 

Preheat the oven to 375°F (180° C).

Put the turkey in a baking pan. Cover the breast with aluminum foil. Roast for 30 minutes. Remove the foil and pour some chicken stock over the turkey, spreading it with a brush. Roast for 2 more hours (or until a total time of 15 minutes per pound of turkey), turning occasionally for an even roast and adding stock every 20 minutes. The turkey will be cooked when the juices come clear when inserting a knife between the thigh and the drumstick, or when the temperature on a thermometer inserted on the thickest part of the thigh reaches 165° F (70°C ).

Pour the juices in a bowl and let the turkey rest for 20-30 minutes covered with foil before carving.

12.02.2012

The healthiest fast food


I know I know I know, I haven't been writing a lot lately! And I am sorry! The truth is that I have a full time job and 3 kids and a dog and I volunteer on the weekends, so I really don't have time! Ok, all the former is a total lie, but what do you want me to say? I have been busy. And I have to plan a wedding. 

Anyway, last week was Thanksgiving, which means that I gained the 4 pounds that I had lost over like 2 months.  So all I want to eat now is low fat, low carb, low calorie food. I am obsesed with healthy food. I even started a pinterest board call healthy weeknight dinners, because even when I am in healthy mode, I refuse to give up taste and pleasure in food. I know this sounds like one of those Jenny Craig comercials, but the truth is that it is possible to enjoy low calorie food. 

Although I don't think I will completely stop making cupcakes or ice cream, this coming year I am going to try to cook healthier than I usually do...you know, we have to look skinny on our big day, says Vogue and all..

On my trip to Spain 3 weeks ago, my mom made salmon en papillote. Papillote is a beautiful french word that means parchment, but sounds so much better. This cooking technique involves wrapping the food in a  little parchment packet so it cooks in its own steam when you put it in the oven. It is super easy, super clean, super tasty and super healthy. So the other day I was looking through my food magazines in an obsesive look for healthy food and I found this recipe. Took like 20 minutes to make, of which at least 5 where for taking pictures. 


I started with some salmon, sliced zuchinni, some cherry tomatoes, half a shallot and fresh basil. You can substitute pretty much any other fish and vegetables you like.


I put it over a sheet of parchment, drizzled everything with olive oil and a splash of white wine, and seasoned it with salt and pepper.


Then I had to close the packet and I had no idea how to do it. This video was really helpful!


After 12 minutes at 400 degrees, tadaaaa, nicely cooked!

Salmon en papillote
From Bon Appétit, October 2012, serves 1.


1 salmon steak
4 cherry tomatoes, halved
1/2 small zucchini , thinly sliced
3 basil leaves, chopped
1/2 shallot, thinly sliced
2 tbsp olive oil
1 tbsp white wine

Preheat the oven to 400° F (200°C).

Place a square of parchment on a work surface. Layer the squash, tomatoes, shallot and basil over it. Season it with salt, drizzle with the wine and 1 tbsp of olive oil. Place the salmon atop, season with salt and pepper and drizzle with 1 tablespoon of oil.

Fold parchment over the mixture and crimp edges tightly to for a sealed packet. Put the packet on a baking sheet and place it in the oven for 15 minutes. Carefully open the packet and enjoy a tasty healthy dish.

10.12.2012

Pumpkin and Politics


Pumpkin is to fall what politics is to Washington DC. And that is why I made pumpkin cupcakes and brought them to a debate watching party. Because it's fall already, and because this Washington DC. 

My friends and family back in Spain will find it weird to hear that I meet with my friend's at someone's house to watch the presidential debate. Probably a lot of Americans would also think it's kind of weird, or boring, or even lame. However, in this city, politics are a huge part or everyday life as so many jobs here are directly or indirectly related to government. Most of my friends here are lobbiests, lawyers, senator staffers, engineers that work for government contractors..so since I moved here I have had to get used to have politics be a really frequent conversation subject. I guess in Spain we don't really talk about it that much among friends as it is impossible to do so and have a good time.

But I am not as much into politics as I am into food, so I had to bring something to eat to this debate watching gathering. I made Martha Stewart's pumpkin cupcakes recipe. I had tried these cupcakes last year at a Halloween party, and after eating like four of them I had to ask the host where she got the recipe from. 


I used a one bowl approach for this recipe. Sometimes I like to get my hands dirty and my arms tired instead of using the stand mixer. This recipe was simple enough for it, as no whipping or beating was required.


For the icing I used the recipe from Patent and the Pantry and from now on I tell you that this is going to be my go to cream cheese frosting recipe. So good that when I was done covering the cupcakes, I had to pipe some of the leftover icing directly into my mouth. I also think it sounds gross, but it tasted like heaven. 


Obama did a terrible job in that debate, but the cupcakes were the touch of fall that we all needed.

Pumpkin cupcakes with cream cheese frosting
Adapted from Martha Stewart, makes 12

For the batter:
1 cups (128 g, 4.5 oz) all-purpose flour
1/2 teaspoon baking soda
1/2 teaspoon baking powder
1/2 teaspoon coarse salt
1/2 teaspoon ground cinnamon
1/2 teaspoon ground ginger
1/4 teaspoon freshly grated nutmeg
1/2 cup packed light-brown sugar
1/2 cup granulated sugar
1/2 cup (1 stick, 110 g) unsalted butter, melted and cooled
2 large eggs, lightly beaten
1/2 can (210 g, 7.5 oz) pumpkin puree

For the frosting:
8 oz (220 g) cream cheese, room temperature
1/2 cup butter (1 stick, 110 g), room temperature
3 cups (385 g) confectioners sugar, sifted
1 tsp pure vanilla extract

Make the batter and bake the cupcakes:

Preheat oven to 350°F (180°C)

In a medium bowl mix the flour, baking soda, baking powder, salt, cinnamon, ginger and nutmeg. In another bowl mix the sugars and the butter until light and fluffy. Add the eggs, one at at time and mix until well incorporated. Add the dry mixture to the wet mixture gradually and mix well. Mix in pumpkin puree.

Line a cupcake pan with liners and fill each one about halfway with batter. Bake until tops spring back when touched and a cake tester comes out clean, about 20 to 25 minutes. Transfer to wire rack and let cool completely before icing.

Make the icing and finish:

While the cupcakes are cooling down, beat butter and cream cheese until light and fluffy. Add vanilla and sugar and mix until incorporated. 

Spoon the icing into a pastry bag with a star tip and pipe the frosting on top of the cupcakes starting on the edges and forming a spiral towards the center. 


10.09.2012

Hi five duck


When it comes to food, some people are very easy to please. They are happy with every homemade food you give them and almost never complain. They like, almost, everything. Examples of that kind of people are my mom, my sister and myself. Scott is not one of those. He is much more demanding, he loves to eat, but he won't eat anything. He is much harder to please, much more sophisticated. So when I put food on the table, he tries it and says: "Oh my...this is just perfect!", and he gives me a high five, then, guys, I have cooked something really awesome.

That is exactly what happened when he had his first bite of this duck confit. And when that happens, I smile, mark the recipe as a good one, and share it on spoonglish with you.

So what is duck confit? Duck confit is a french recipe for cooking duck legs in duck fat at a low temperature for a long period of time. After it's cooked, the duck can be stored in the fat for a long period of time before it's eaten, so it is some kind of preserve. I had eaten duck confit many times at home, but always from cans. However, since I have an obsession for making things that most people buy already made (ice cream, baguette, burger buns), I also felt that I had to make this delicious french specialty from scratch; and so I did.


Duck Confit
Makes 6, adapted from Bon Appetit and French Cooking

So this recipe has 2 parts. In the first part, I explain how to make the duck confit. It is extremely easy to make, it just takes time. The second part of the recipe is just an idea of what you can make with duck confit. I like it pan seared because the skin gets crunchy, and it is delicious served with a sweet sauce. However, you can also serve it cold in salads, with pasta, with rice or pretty much anything you can imagine.

6 duck legs
3 tbsp coarse kosher salt
1/2 tbsp dried thyme
2 tsp ground white pepper
1 bay leaf, chopped
6 garlic cloves, peeled
4 8oz containers of rendered duck fat
1/2 cup water
2 tablespoons vegetable oil

Mix salt, bay leaf, thyme and white pepper in a bowl. Pat dry the duck legs and rub the mixture on both sides. Put them in a plastic bag with the garlic cloves and refrigerate overnight. 

Preheat the oven to 325°F (160°C).
Melt the duck fat with 1/2 cup of water in a sauce pan and bring to a simmer. Keep cooking until simmer slows and the water has evaporated, about 20 minutes. 

Rinse the duck legs to get rid of the salt mixture and pat dry. Arrange the legs in a baking pan, on one layer. Pour the duck fat over the duck legs. Cover the pan with foil. Place in oven and let it cook until the meet is tender and falling of the bones, about 3 1/2 hours. Let it cool slightly and transfer to the fridge for at least 4 hours. 

The confit can be stored in the fridge for up to 1 month. Make sure it is always completely covered in the duck fat. The duck fat can the be reused for other recipes, like potatoes baked in duck fat.


Pan seared duck confit in red wine sauce with duck fat baked potatoes
Serves 2 hungry ones or 4 not so hungry ones

For the potatoes
3 yukon gold potatoes, thinly sliced
1 small onion, thinly sliced
2 tbsp duck fat melted
3 tbsp olive oil
salt and pepper

For the sauce 
1 cup of red wine
1/4 cup (50g) sugar
2 tbsp honey
1 clove
2 tbsp balsamic vinegar
1 container concentrated gelatine-like beef stock (like this)

For the duck 
4 duck confit legs
2 tbsp olive or vegetable oil

Make the potatoes
Preheat the oven to  425° F (210°C). Put the oil and the melted duck fat in a big bowl. Add the potatoes and onion and toss to coat. Season with salt and pepper. In a baking dish layer the potatoes and the onion. Bake for 45 minutes.

Make the sauce
In a medium sauce pan heat the wine with the sugar, the honey, the vinegar and the clove. Add the concentrated stock and bring to a simmer over medium heat. Let it simmer, stirring frequently, for about 45 minutes or until desired consistency.

Sear the duck.
Preheat the oven to 400° F (200° C).
Take the duck legs out of the fat and clean to get rid of most of the attached fat. Heat oil in a sauce pan on medium high. Add 2 duck legs skin down and cook for 1 minute. Transfer to a baking sheet. Cook the other 2 legs and transfer to same baking sheet. Place in the oven and cook for 15 minutes. 


Finally, serve the duck legs, skin side up, with some sauce and potatoes. Enjoy, and expect high fives!


9.07.2012

See you later, summer


Labor day is supposed to be the last weekend of the summer. To say goodbye to it, we went to the beach. I don't think I have ever told you how much I love the beach. I never get tired of it. We went to the Outer Banks in North Carolina, where some of my favorite beaches in America are. The weather was on an off, like a struggle between the sunny summer and the rainy fall. The beach was almost empty and the water was warm after all the summer months.


It has been a great summer. It all started with the trip to Chincoteague. Then came Italy. After that, Almu's visit and our trip to NYC. Then a month in Spain with trips to Paris, Lisbon and Tarifa. Then my sister's visit and a second trip to New York City with her. And finally, the OBX. Wow, now that I think about it, it has been amazing!


Now it's time to wrap up, put away the flip-flops and the summer dresses and say see you later, summer. And here is (what might be) this year's last summer recipe: cantaloupe  and ham salad. I learnt this recipe from my mom, who learnt it from my aunt Papusa one time we visited her like a million years ago. The only thing I have changed is the type of melon because in America I can't find the Spanish type of melon. However, it can be made with any kind of melon as long as it is ripe and sweet.

This is a much better version of the typical prosciutto and melon appetizer. It is refreshing, and the combination of flavors can't be any better. I don't know what else can I say about a salad, but I really want to convince you to make it. Make it know, when the cantaloupes are in season. Make it with a good Serrano or Iberian ham if you can, or just try it with prosciutto or a cured ham of your choice. Do not forget the pine nuts because the add a great crunchiness to it. Do not ever skip the mint because that is the ingredient that wraps all the flavors and adds a super refreshing touch. 


Cantaloupe and Ham Salad
Serves 4

1 cantaloupe, diced (or balled)
3 oz (85 g) thinly sliced cured ham (such as Serrano or prosciutto), chopped
2 tbsp toasted pine nuts
10 mint leaves, chopped
1 tbsp white wine vinegar
1 tbsp lemon juice
4 tbsp olive oil

In a serving bowl add the melon, ham and pine nuts. Add the chopped mint and salt to taste. In a small bowl mix the lemon, vinegar and oil to make a vinaigrette. Pour the vinaigrette over the salad ( no need to use all, use as much as you like) and toss to coat. Refrigerate until ready to eat. 

8.22.2012

Dinner for one


I have been home alone for a couple of days. I am pretty bad at being alone with myself. I like me, don't get me wrong, but when it comes to entertain myself, I am not enough.- It's not me, it's myself, I need something else, I understand, right?- Yes. -OK. (See? Not good at being alone). Fortunately my sister is coming today to take me away from this crazy solitude.

One of the things that I'm bad at when I'm alone is eating. I tend to skip lunch, and then I get super hungry and I start going to the fridge to snack trying to deceive my stomach until dinner. Yesterday was no exception. I spent all day cleaning and doing laundry like a crazy person, and I forgot to eat lunch. When I finished the chores I decided that I was going to eat dinner like a normal person, or actually, like two normal persons, because I was very very hungry. So I found this recipe and 3 perfect reasons to make it: 1) it looked yummy; 2) I had chicken in the freezer and parsley in a glass of water; 3) I wanted to use our new food processor and I hate hate hate chopping parsley by hand.


The trick of putting the parsley in a glass of water is something that I have learnt from my mom and my grandma. It's a great idea! It stays fresh for about 2 weeks. Another way to keep fresh parsley that my grandma recently showed me is to freeze it in a tupperware once chopped. The food processor worked great for chopping the parsley, a process that lasted exactly 5 seconds. I was so amazed. Goodbye chopping parsley with a knife!


The recipe did not disappoint. On the contrary, it was delicious. Although it calls for one hour and fifteen minutes of braising, I only cooked it for 45 minutes. Scott always accuses me of cutting down cooking times, but this time I was about to starve so I couldn't help it. 

Finally, I got my meal of the day in company of these pretty roses. I don't like eating alone.


Braised chicken with parsley and capers
Adapted from Bon Appétite, Serves 1

1 small onion, finely chopped
2-3 chicken thighs, or drumsticks, or combination
1/4 cup (4 tbsp) chopped parsley
2  tbsp capers, rinsed
1 1/2 cups (350 ml) chicken stock
1/4 cup (60 ml) white wine vinegar
Olive oil, salt and pepper

Heat 2 tablespoons of olive oil in a heavy skillet over medium heat. Add onion; cook, stirring often, until softened, about 4 minutes. Transfer onion to a bowl. 

Add more oil to the skillet and increase heat to medium-high. Season chicken with salt. Add chicken to skillet and cook, turning once, until golden brown on both sides, about 10 minutes. Transfer chicken to a plate.

Add reserved onion, parsley and capers to skillet and cook for 1 minute. Add chicken stock, vinegar and chicken with juices. Reduce heat to medium-low, cover and simmer until meat is tender and falling off the bone, about 1 1/4 hours (or 45 minutes if you can't wait). Transfer chicken to a plate. Season sauce with salt and pepper and spoon over the chicken. Eat, alone or not. 

Note: For 2 servings, just add more chicken. For 4 servings, double the stock, the vinegar, the parsley, the onion and the capers. 

8.20.2012

A soup that is on a diet

I was thinking about starting this post apologizing for having almost abandoned you in the past couple months. I wanted to explain to you why I have been missing and tell you that I'm going to be better at writing in spoonglish from now on. But I'm not going to do that. Whatever, right? It's not like you care that much.


Instead, I'm just going to write about this AMAZING tomato soup. It's from the book Essentials of French Cooking, from Williams-Sonoma. The pictures of this book are so mouthwatering that you want to make everything that is in it. However, when you start making the recipes, the pictures are only there to tell you that your version doesn't look nearly as good. But who cares about looks, right? Beauty is inside, and in this case, inside a soup bowl with a puff pastry cover. 


My favorite thing about this recipe is the flavor added by the fresh thyme. It makes it different from most tomato soups and so delicious. I also love the idea of the puff pastry on top. It makes it look like a mushroom and then it's so good to eat it breaking the pastry into the soup and eating it all together. 

What I did not find so compelling was the 4 cups of heavy cream that the recipe calls for. Four cups! That's when the eternal question comes again: why aren't french people fat?  I decided to make this soup be on a diet and halve the amount of cream, because I prefer to have more tomato flavor and less regret. 


Although this might seem like a pretty wintery dish, now is when tomatoes are at their best, so now it's when you want to make this. Here is the adapted recipe:


Tomato soup with puff pastry
Serves 4-6. Adapted from Essentials of French Cooking, Williams-Sonoma

2 lb (1 kg) ripe tomatoes
1/2 cup (125 g) unsalted butter
1 small or 1/2 big yellow onion, chopped
2 garlic cloves, minced
1 bay leaf
2 teaspoons of minced fresh thyme
2 cups (500 ml) heavy cream
2 sheets of puff pastry
1 large egg beaten with 2 tbsp water

Bring a big saucepan of water to a boil. Score an X on to bottom of each tomato and add them to the boiling water. After 30 seconds take the tomatoes out of the water using a slotted spoon. Peel and quarter the tomatoes. 

In a large saucepan, melt the butter over medium heat. Add the onion and cook until translucent, about 3 minutes. Add the garlic and stir for 1 minute. Reduce the heat to low and add the tomatoes, bay leaf, thyme, salt and pepper. Cook, stirring often, until the tomatoes are soft, about 20 minutes. Discard the bay leaf.

Working in batches in a blender, or using an immersion blender, puree the tomato mixture until smooth. Strain through a fine-mesh sieve and return to pan. Stir in the cream and bring to a simmer over medium heat. Remover from heat.

Preheat the oven at 400°F (200°C). Roll out the puff pastry until 1/4 inch (6 mm) thick and cut rounds that are slightly larger than the diameter of an ovenproof bowl. Place the soup bowls on a baking sheet and ladle the soup into the bowls. Place the pastry rounds on top of each bowl and pull the edges tight. Brush the pastry with the egg wash. Bake until the pastry is puffed and golden, about 15 minutes. Serve immediately. 

8.01.2012

Americanizing myself


It has been a year since I moved to America. It was summer (obviously) and Scott and I had huge fights about the air conditioning all the time. He, as a good American, wanted to have the air conditioning on all the time so the apartment was constantly at 67º F. I, as a good Spaniard, hated the AC and wanted to turn it on only if the temperature went over 80º F. In Spain, summer is supposed to be hot and most people believe that air conditioning is not good for you. That's just the way it is. But now, a year after, America has won the battle. We never fight about the AC anymore, and it's always on. When my friend Almu visited us from Spain, she didn't stop complaining about the Air Conditioning in restaurants, the metro, the stores and...our apartment! I realized that I now love the AC and that going from a 100º F street to a 68º F store is like going from hell to heaven. 

Now I am in Spain, and I can't get used to not having air conditioning. The heat keeps me up at night and sweaty during the day. It makes me be in the mood of notdoinganything, and that includes cooking and blogging. Also, I am at my mom's, so why would I cook? However, people ask me why I haven't been blogging recently, so I decided to finish this post, which I started to write about 3 weeks ago, after making delicious peach tart for the first time.

Since I saw Amanda Hesser's peach tart recipe last winter I had been wanting to make it. However, I had to wait for the summer to come and sweet afordable peaches to arrive to the grocery store. Finally, last week about 3 weeks ago, the wait finished.

I used white peaches the first time, the one you can see in the pictures. The second time I made it I used yellow peaches. It's delicious with both as long as they are ripe.The first time the crust was too thin, so the second time I doubled the recipe (thanks Lisa) and used enough to get the desired thickness. 


Peach tart
Adapted from Amanda Hesser, Food 52. Serves 8.

For this tart I used a 11 inch (27 cm) diameter removable bottom tart pan.

3 cups (380 g) plus 2 tablespoons all-purpose flour
1 1/4 teaspoons kosher salt
3/4 cups (150 g) plus 2 teaspoon sugar
1/2 cup (120 ml) vegetable or canola oil
1/2 cup (120 ml) mild olive oil
4 tablespoons whole milk
1 teaspoon almond extract
2 tablespoons cold, unsalted butter
4 small ripe peaches, pitted and thickly sliced (about 1/2-inch (1 cm) wide)
1 handful of chopped bleached almonds

Heat the oven to 425º F (220º C).
In a mixing bowl, stir together 3 cups (380 g) flour, 1 teaspoon salt and 2 teaspoon sugar. Stirring enables the salt and sugar to sift the flour, so you don’t need to sift it in advance.

In a small bowl, whisk together the oils, milk and almond extract. Pour this mixture into the flour mixture and mix gently with a fork, just enough to dampen; do not over work it. Then, transfer the dough to an 11-inch tart pan, and use your hands to pat out the dough so it covers the bottom of the pan, pushing it up the sides to meet the edge. It should be about 1/ 8-inch thick all around. Trim and discard excess dough. 

In a bowl, combine 3/4 cup sugar, 2 tablespoons flour, 1/4 teaspoon salt and 2 tablespoons butter. (If your peaches are especially juicy, add 1 tablespoon additional flour.) Using your fingers, pinch the butter into the dry ingredients until crumbly, with a mixture of fine granules and tiny pebbles. 

Starting on the outside, arrange the peaches overlapping in a concentric circle over the pastry. Fill in the center in whatever pattern makes sense. The peaches should fit snugly. Sprinkle the pebbly butter mixture over top (it will seem like a lot). Sprinkle the almonds. Bake for 35 to 45 minutes, until shiny, thick bubbles begin enveloping the fruit and the crust is slightly brown. Cool on a rack. Serve warm or room temperature. It is delicious with vanilla ice cream.


7.02.2012

A fall cake for a summer birthday


I know, its been ages since I last posted. First there were too many things going on and I didn't have time to post, and then an amazing two week vacation in Italy happened. But stop worrying, in case you were worrying, because I am back and I have plenty of recipes to talk about.

Let's start from the beginning. Scott's birthday was on June 5th (almost a month ago). I don't know how it is in your family, but in my family, and in his family, if it's your birthday you get to choose the dinner menu. He chose a bunch of things I am not going to write about now: truffle bacon mac and cheese, fried rice, sweet-sour pork and bl-tomatoes. Three out of the four have bacon in it. The weekend after his birthday we celebrated it with friends and I made a cake that he also chose: bourbon pumpkin cheesecake. This cake is anything but summery. The color, the ingredients and the flavor make the most fall-like cake you can think of. I wanted to make a layer chocolate and raspberry cake, or a blueberry and lemon cake, but if it's your birthday you choose and this is what Scott chose.


Bourbon Pumpkin Cheesecake
Adapted from Gourmet, November 2003, via smitten kitchen


For this recipe you need a 9 inch spring form pan. If you don't have one you can use a regular cake pan, but you won't be able to present it so pretty. If you only have a bigger pan, increase the amount of crackers and butter or the crust will be too thin. Everything else can remain the same, but the whole cake will be thinner.

For the crust
3/4 cup (75 g) graham cracker crumbs (from five 4 3/4- by 2 1/4-inch crackers)
1/2 cup (69 g) pecans, finely chopped
1/4 cup (35 g) packed light brown sugar
1/4 cup (45 g) granulated sugar
1/2 stick (60 g) unsalted butter, melted and cooled

For the filling
1 1/2 cups (350 g) canned solid-pack pumpkin
3 large eggs
1/2 cup (70 g) packed light brown sugar
2 tablespoons heavy cream
1 teaspoon vanilla
1 tablespoon bourbon liqueur or bourbon (optional)
1/2 cup (90 g) granulated sugar
1 tablespoon cornstarch
1 1/2 teaspoons cinnamon
1/2 teaspoon freshly grated nutmeg
1/2 teaspoon ground ginger
1/2 teaspoon salt
3 packages (24 oz / 680 g) cream cheese, at room temperature

For the topping:
2 cups (500 g) sour cream
2 tablespoons granulated sugar
1 tablespoon bourbon liqueur or bourbon (optional)
Pecan halves for garnish

Make crust:
Stir together cracker crumbs, pecans, sugars, and butter in a bowl until combined well. Press crumb mixture evenly onto bottom and 1/2 inch up side of a buttered 9-inch spring form pan, then chill crust, 1 hour.

Make filling and bake cheesecake: 
Put oven rack in middle position and preheat oven to 350°F.

Whisk together pumpkin, eggs, brown sugar, cream, vanilla, and liqueur in a bowl until combined. 

Stir together granulated sugar, cornstarch, cinnamon, nutmeg, ginger, and salt in large bowl. Add cream cheese and beat with an electric mixer at high speed until creamy and smooth, about 3 minutes. Reduce speed to medium, then add pumpkin mixture and beat until smooth.

Pour filling into crust, smoothing top, then put springform pan in a shallow baking pan (in case springform leaks). Bake until center is just set, 50 to 60 minutes. Transfer to rack and cool 5 minutes. (Leave oven on.)

Make topping:
Whisk together sour cream, sugar, and liqueur (if using) in a bowl, then spread on top of cheesecake and bake 5 additional minutes. Arrange pecan halves on top of the cake. Cool cheesecake completely in pan on rack, about 3 hours.

Chill, covered, until cold, at least 4 hours. Remove side of pan and bring to room temperature before serving.


6.01.2012

Summer flavor


Not having to wear socks for 4 months, flip flops, summer dresses, ice cream, pools, sun, the beach, barbecues, tanning, going out at night without a coat. In case you haven't noticed, I am talking about the summer. I am talking about why the summer is my very favorite time of the year. And I am talking about that because, finally, the summer has arrived!

Last weekend we went away and experienced the beginning of the hot season first hand with a good dose of beach, friends, ice cream, grilling, playing in the sun, and mosquito bites (that's not one of my favorite summer things). We went to Chincoteague Island (Chincowhat?), a beautiful retreat in Virginia, and we happened to rent the most amazing house just by the water.


But now we are back to our tiny apartment on the 22nd floor, without an ocean view, looking at rooftops and surviving thanks to the AC. I really had to make something to get that nice feeling of summer back, and so I did. I made Salmorejo.

Salmorejo is a very typical Spanish cold tomato soup. -Gazpacho?-You ask. No, Gazpacho is Salmorejo's little brother. Salmorejo is the fatty version of gazpacho. The flavor and the texture are a little different, as gazpacho has more vegetables, less oil and less bread than salmorejo . While gazpacho is more liquid, more acidic and more refreshing, salmorejo is thicker, creamier, tastier and much heavier. Gazpacho is usually garnished with cubed tomatoes and cucumbers. Salmorejo is garnished with croutons, cured ham and hard boiled egg. While eating a bowl of gazpacho always makes you want more, eating a bowl of salmorejo makes you not want to eat more in a week. You get it, right?

Salmorejo makes me think of summer. It reminds me of the beach of Cadiz, where I spent many summers of my life.

What foods bring YOU summer memories?


Salmorejo
Serves 4

The important thing here is to use very ripe and flavorful tomatoes. Plum tomatoes are good for this, and tomatoes on the vine are also fine if they are ripe. I usually don't peel the tomatoes because I have a very powerful blender, but if you don't or you find that the skin is too thick, peeling them should be better. Salmorejo should be thick and the thickness will depend on the amount of water in the tomatoes. If you find it not thick enough, add more bread. If you find it too thick, just add water. 

For the salmorejo
2lb (1kg) ripe tomatoes
2 garlic cloves, peeled
3 slices white bread
1/2 cup (8 tbsp, 120ml) extra virgin olive oil
1 1/2 tsp salt
1 tbsp cider vinegar

For the garnish
2 tbsp chopped serrano ham or prociutto
1 egg, hard boiled, chopped
Croutons

To peel the tomatoes, boil water in a medium sauce pan. Score the bottom of each tomato with a cross and put in the boiling water, in batches, for 30 seconds. After this process the skin becomes lose and really easy to remove. 

Peel and quarter the tomatoes, and put them in the blender. Add the garlic cloves. Soak the bread in water and squeeze it with your hands. Add the bread to the blender. Puree until smooth, about 3 minutes (it will depend on the blender, but the soup should be smooth with no lumps). Open the blender and add the oil, salt and vinegar. Close the blender and mix for 10 more seconds. Pour the soup in a bowl and refrigerate for at least 2 hours.

Serve the salmorejo in soup bowls and sprinkle with some serrano ham, hard boiled egg and croutons. Drizzle with olive oil.